11th Dream allows creating your own levels – or as we call them, „maps“. In this article, we would like to explaing how to use the map editor.
Map generation
First of all, we have to generate a new map. The map editor is located directly in the game’s program, there is no need to install or launch a separate application. Navigate to editor menu to see the options for the new map.
- Seed sets up the random number generator. Different value of seed causes different map look.
- Terrain size sets the world size in terrain tiles. When set to lowest value, terrain is not used. However, we recommend having a terrain on your first map since it helps with orientation and object placement.
- Terrain elevation lets you choose between flat or hilly terrain.

Map is created after clicking on GENERATE, named by current date and time and it is stored in AppData folder. Later you can easily navigate to directory with all user maps from the editor menu.
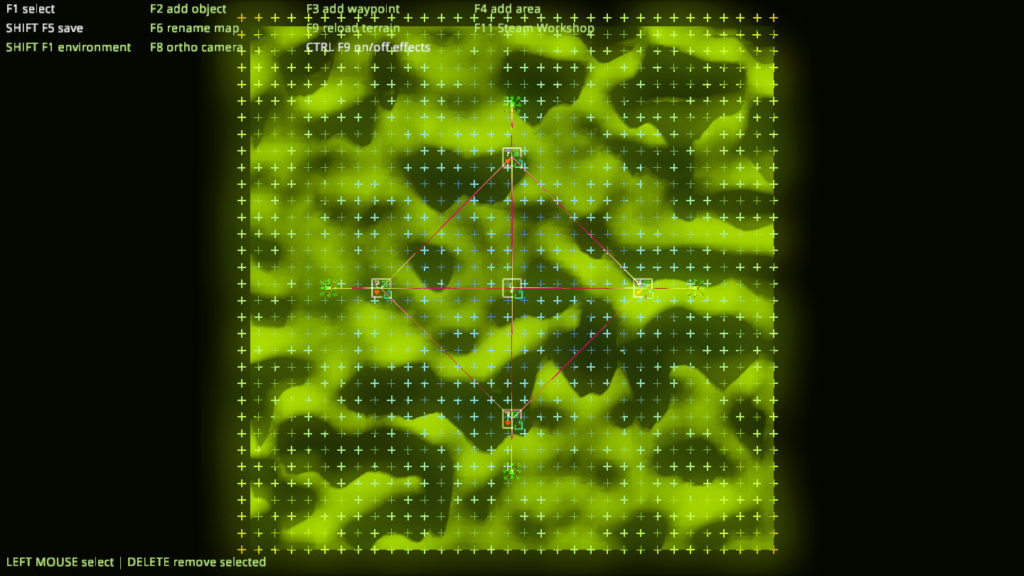
Congratulations! Your first map was generated and now you are viewing it in the editor from above. Top rows show editing actions and their key binding.
At this point it is desirable to rename the map. Hit F6 and type in the new name.
Navigation
It is rather unpractical to edit the entire map from above. Hit F8 to switch to perspective view with movable camera. Camera controls are similar to in-game controls.
- Right mouse button to rotate the camera
- WSAD to move around
- space bar to elevate
- C to descend.
Hitting F8 switches back to top-down view.
In some cases, it might be useful to switch off all post-processing effects with CTRL F9.
Terrain
Terrain is composed from several bitmaps and it is not edited directly by the editor. If you want to alter the generated terrain maps, open them in your favourite image editor.
- Height map shapes the terrain. Lighter the pixels, higher the location.
- Terrain map chooses between two terrain textures specified in terrain JSON config. Black selects the first texture, white the second one, any shade of gray mixes them together.
- Color map affects terrain color. It can be used for darkening some terrain regions.
- Doodads map affects placement of „clutter“ models – usually grass or rocks. Doodads bitmap allows using all three channels to place models from three groups of models described in doodads JSON configs.
It is possible to keep the game running and reload the terrain from bitmaps by hitting F9.
Static Objects
It is time to add objects to the empty environment. Push F2 to switch to object editing mode. Hitting F2 twice opens up selection of placed model.

Selected object should be now on your screen, rendered semi-transparent, prepared to be placed. You can place it any number of times by clicking left mouse button. Placement can be undone with CTRL+Z.
If you need to rearrange your objects, go back to select mode (F1), select your object and move it around using displayed gizmos. Keys E, R, T switch between translation, rotation and scale. Selected objects can be deleted.
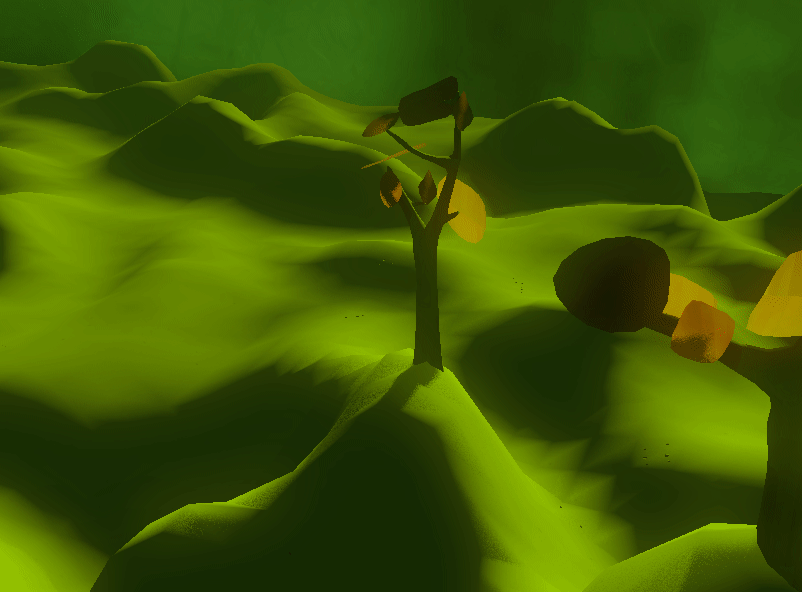
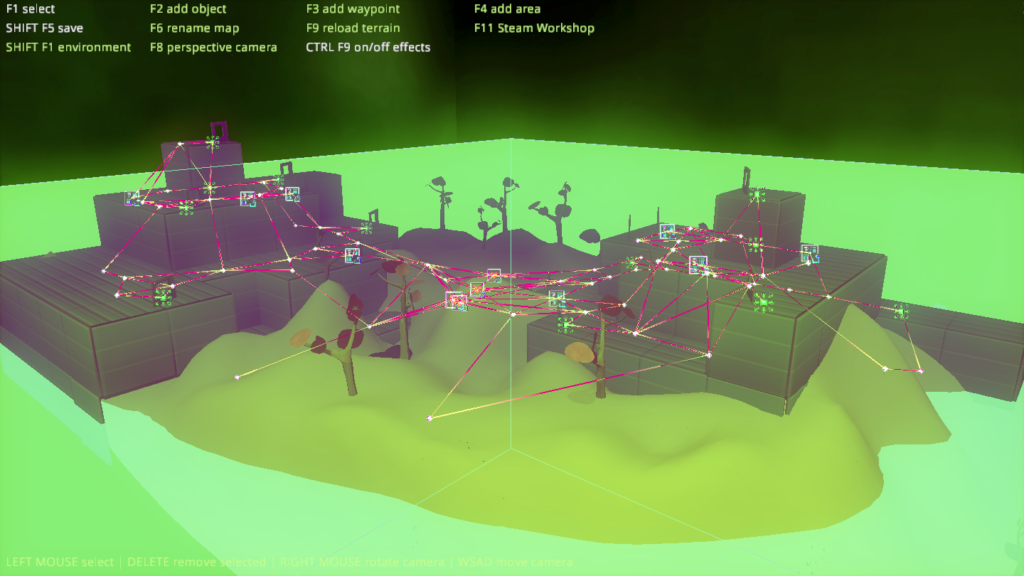
After a while, your map may look like on picture below, containing many static objects. Now it is time to place waypoints.

Waypoints
Waypoints serve for multiple things. They define where the players and bonuses spawn, and provide pathing information for AI.
Generated map comes with nine default waypoints which serve nicely for quick test, but when creating a custom map, they should be probably deleted and replaced with new ones.
Hit F3 and start placing a net of waypoints. The network should be dense enough to give AIs change to pick between several paths. Also, try to place the waypoints near covers.
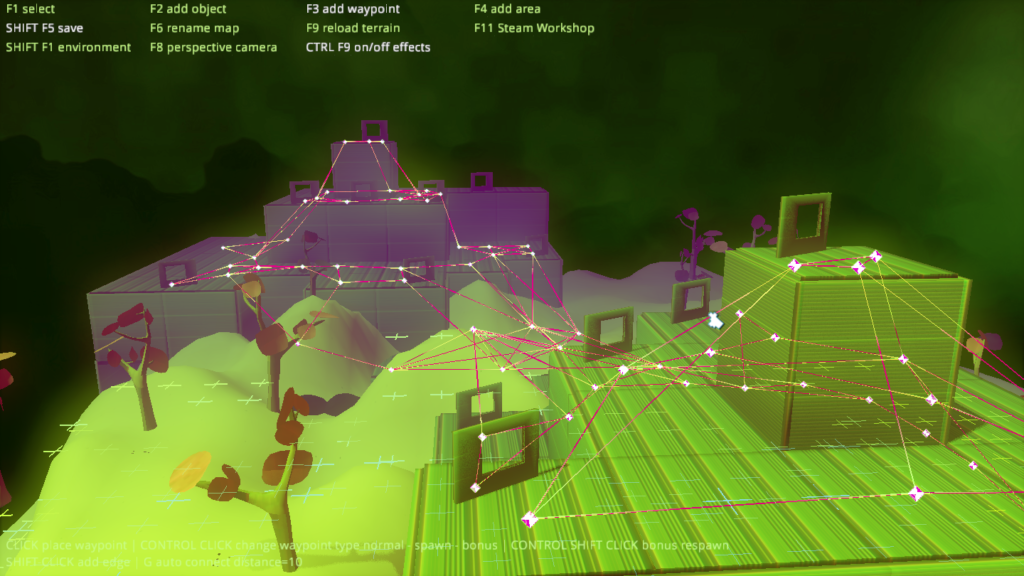
Once you are done with the network, place spawns and bonuses. Any waypoint can be changed to spawn or bonus by clicking on it and holding CONTROL at the same time.
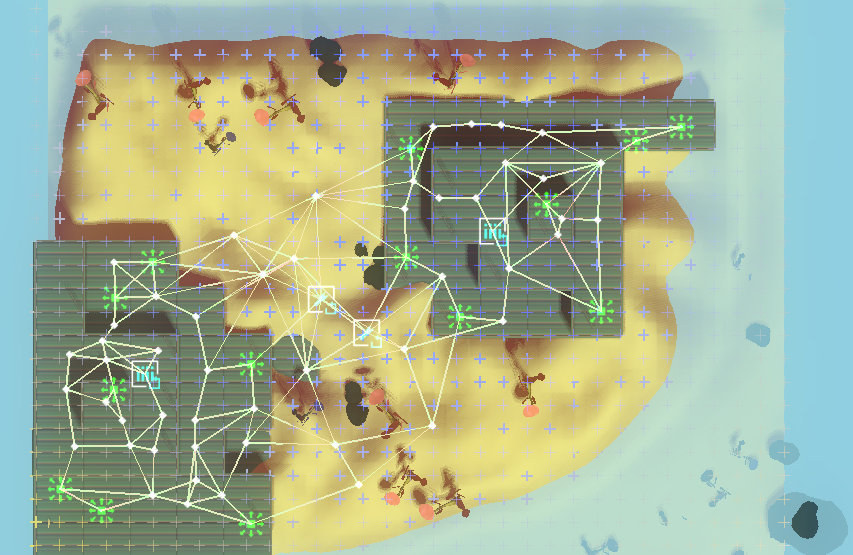
Areas
If you want to place triggers or death zone, press F4 to switch to mode for placing areas. Placing areas works similarly to placing objects. In our example map, we are using areas to place a water death zone.
Environment
Environment contains several settings which affect the look and feel of the map. It is possible to change the map lighting, fog density and color and finally, sun position, size and color.
All configurable values are displayed at the bottom of screen with their key bindings. Hold the key to increase the value, or hold it with Shift to decrease it.
Custom Assets
When creating a map, you might want to add your custom assets – textures, models, skyboxes. Or you might want to replace „vanilla“ assets with your custom ones.
To do so, create a folder named data in the map directory. All assets in data are registered as if they were present in the game’s directory directly – with corresponding local addresses. Any „vanilla“ file in game’s directory is replaced by map’s custom data.
Testing
Every time you save a map, its runtime version is packed and registered in game. Browse the skirmish menu to find your own map and test it against bots. You can also test your maps in multiplayer – just make sure that you are the server host!
Workshop
If you are happy with your creation, consider sharing it on Steam Workshop. The process is straightforward.
When in editor, press F11 and confirm the upload with ENTER. The game will then inform you about upload progress and result. You can update the existing map as many times as you like, so the first upload version has not to be final!
That should be all the basics!
See you in your arena!
Best,
Filip, Michal, Vojta
11thdreamgame.bluepulsar.cz
Follow us on twitter or instagram and ask us anything on our discord server. We are also happy to invite you to join our new mailing list, so you stop missing all those 11th updates!
